January 24, 2024
Next up in this series of “pick stuff off the floor” movements is a “historic” lift: the Jefferson Deadlift. This lift was used in the past by strongmen as a variation on the deadlift motion, often to pick up something awkward such as heavy stones. It has regained favor in the lifting community recently due to its ability to target muscles missed with other techniques.
Once again, the deadlift has caught on so much in the rehab world due to its utility. It is hard to beat the function of picking something up…we all need to at some point or another. Plus, if you can pick yourself PLUS a weight then getting yourself alone up should be easier. With the Jefferson deadlift, we bring in the concept of asymmetry – intentionally creating some overload on one side and then the other. Very rarely can we pick a real-world object up with 100% optimal positioning. Hard to get more functional than that. So, let’s get to it.
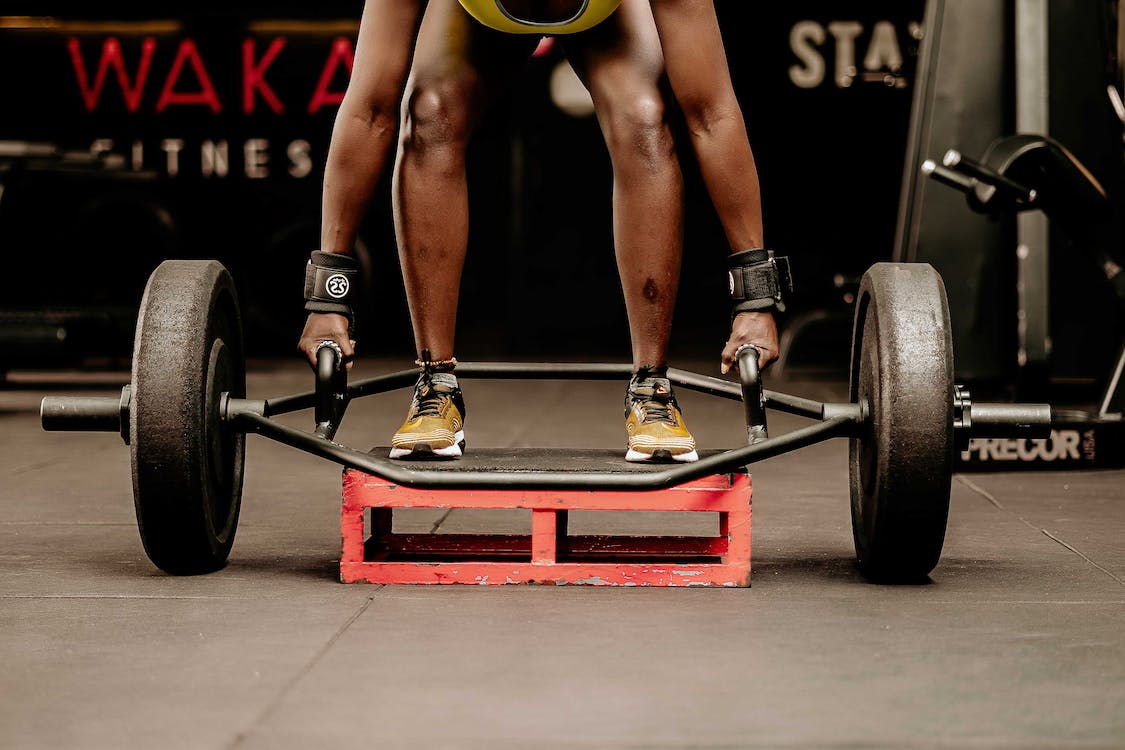
The Jefferson deadlift starts out differently right from the foundation. Instead of standing with the bar in front of you, you will straddle the bar with one foot. This allows you to crouch more than hinge, thus involving the quadriceps on the front of your thighs, as well as avoids potentially aggravating flexion if your lower back is currently sore. The foot that is behind the bar has the toe turned out while the foot that is over the bar is straight ahead. The hands will match this: “behind hand” is turned thumb out while the “forward hand” is over the top of the bar.
Same as on the conventional deadlift, one quick aside is that if you are lifting with a barbell, the standard diameter 45 pound plate is considered the normal height for the rack pull. If you are unable to lift 135 pounds (a pair of 45 pound plates on a 45 pound bar) then you’ll either need to try using “bumper plates” or find some way to build the bar up to about 8 inches from the floor. Bumper plates are rubber plates that are the same diameter as the standard 45 pound plate, no matter the weight.
Once you have the bar set up it is go time. You will crouch down to grasp the bar with your hands, remembering to turn out the back hand to match that foot. Bring your chest up and tighten the elbows up. Take your deep breath, push off, and then blow the air out once the bar crosses your knee line. Now, the bar will get a little “friendly” with you since you are standing right over it. Try to still stand up as tall as possible. Do not let the bar twist and try to keep your chest tall and pointing the same direction that it started in. You did it!
From there, the lowering is just reversing the motion. Keep your upper body tight while you crouch your legs to lower it back to the ground. Stay in control.
To summarize and give a check list: straddle the bar with the front foot forward and the back foot turned out. Crouch to grasp the bar, with hands matching the feet. Build your upper back tension. Breath in. Push yourself up and let the air come out until you stand tall. Do not let it twist you.
Training a Jefferson deadlift can address some left versus right differences that might get missed with conventional lifting. It is a great tool to work on addressing imbalances. It involves more muscles and can be used with lower back soreness to avoid potentially uncomfortable flexion. Get out there and give it a try, but please talk to your New Life Physical Therapy provider if you have any questions about lifting or need guidance.
Featured Posts

Knee-d to Know: 3 Tricks for Ultimate Knee Health
October 25, 2023

The Jefferson Deadlift
January 24, 2024

Functional Pelvic Bracing To Minimize Strain on Pelvic Organ Prolapse
March 31, 2022

Why Movement Matters
March 16, 2022
Choose your E-book
